Tiers of the Cake


A tasty slice of inspiration...

Hello foodies,

A huge warm welcome to Red Velvet Baking, the blog! I have been baking since I can remember and I have always wanted to share my experiences and tasty flair beyond the walls of my own home. In summer 2011 I launched this little blog. I blog as a celebration of my achievements and dedication to my culinary passion, alongside an overflow of my enthusiasm, with a few added delicious recipe ideas. Pictures and tips galore, sure enough to sink your teeth right into and to get your mouth watering. Delicious beautiful baking can put a smile on anyones face.

Summer 2013 saw me train for a month at Leiths, gaining a distinction in practical cookery and last summer I ran a culinary arts course in the USA, specialising in baking.

I am now back in the UK, writing for my blog from sunny Yorkshire. 2015 is going to be a big year for Red Velvet Baking, so keep posted!

Keep calm, enjoy and most importantly BAKE!


Jessica

xox

Twitter @RedVelvetBaking
Instagram @RedVelvetBaking
Pinterest Red Velvet Baking
Facebook Red Velvet Baking
Website - Undergoing a magical makeover!

Find the missing sprinkle...

Monday, 16 February 2015

Eat: English Pancakes

Hey foodies,

So you've already seen my favourite fluffy pancakes, in previous posts, but what about the English pancake? The English pancake is similar to a crepe and often enjoyed, simply with lemon juice and sugar.


The mixture, similar to that of a Yorkshire pudding, is fried flat in a pan and made with just 4 ingredients. Check out the easy recipe below, for fool proof, tasty pancakes.

Toppings

These days it's all about getting adventurous!  I had my first pancake of the year as an easy, Friday night dessert, served with leftover dark chocolate ganache and fresh raspberries. I then used the rest of the mixture Saturday morning, for greek yogurt and honey breakfast pancakes. The perfect way to celebrate Valentine's Day morning, cue the yogurt heart! 

Why not try:

  • Nutella and chopped hazelnuts
  • Chopped banana and caramel sauce (banoffee)
  • Freshly squeezed lemon juice and caster sugar
  • Whipped double cream and strawberries
  • Mascarpone and lemon curd (beat 100g of each together until fluffy)
The combinations are endlessly delicious! Why not share yours on the comments below...


Recipe adapted from BBC Good Food.

Ingredients

Makes 8-10 Pancakes

150g Plain flour
3 Large eggs
450ml Milk
1tbsp Sunflower or vegetable oil & extra for frying
Pinch caster sugar (salt if making savoury pancakes)

Method

  1. Put the flour and pinch of sugar into a large mixing bowl and make a well in the centre. Crack the eggs into the middle, then pour in about 75ml milk and 1tbsp oil. Start whisking from the centre, gradually drawing in the flour from the edges. Once all of the dry flour mixture is incorporated , beat until you have a smooth thick paste. You may need to give it a little welly! 
  2. Add another 75ml milk and whisk to loosen the batter, starting of slow so you don't splatter the kitchen walls with pancake batter! As the batter loosens, gradually add the remaining milk, whilst whisking. Continue pouring and whisking until your batter resembles the consistency of thick single cream.
  3. Oil the pan with fry light or wipe with a lightly oiled kitchen towel and heat to a moderate heat. Ladle some batter into the pan or pour the batter into a jug for easy pouring. Tilt the batter around the pan, until there's a nice, thin and even coating. Don't be afraid to pour excess batter into a separate bowl/jug to be reused later. Leave the pancake flat against the heat for around 30-40seconds, at which it should be crisp and golden underneath. 
  4. For a quick, safe flip, hold the pan handle and ease a fish slice under the pancake. Quickly lift and flip it over, to fry the other side. Make sure the pancake is flat against the base of the pan, to evenly cook the batter. Give the second side a similar 30-40seconds, but I usually find the second side is much quicker, before turning out onto your plate.
  5. This is the best step! Get creative with your toppings, make them pretty, chocolately or full of fruit. What will you choose?


Keep calm and get flipping.

Love Jess xo


Sunday, 15 February 2015

Eat: Red Velvet Fluffy Pancakes

Hey foodies,


So with lent looming after Pancake Day, are you planning to give up the usual? I could live without alcohol and survive without sweets, but one thing I'd struggle to cope without is CHOCOLATE. I'm toying with the idea of giving it up, so for my last big choctastic blow out, what more could I want than red velvet pancakes, smothered in milk chocolate ganache?! 


A little rich for breakfast, these make the perfect dessert to share. These, pictured above, were demolished by my boyfriend and I on Valentine's Day. I did struggle to finish my pink cava afterwards, so you definitely need to share this tower of chocolatey pancake goodness.


Ingredients

115g Self raising flour
25g Cocoa Powder
2tbsp Golden caster sugar
1tsp Baking powder
2tbsp Melted salted butter
1 Egg, beaten
145ml Milk
1/8tsp red gel food colouring (may need more for deeper colour)

For the Ganache

200g Milk or dark chocolate
150ml Double cream

Additional Toppings

  • Honeycomb
  • Cubed fudge
  • Crushed malteasers
  • Crushed cream egg
  • Marshmallows
  • Chopped hazelnuts

Method

  1. Break the chocolate into pieces and place in a bowl/jug. Heat the cream over a medium heat to boiling and pour over the chocolate. Stir with a spatula until all the chocolate is melted and your a left with a smooth, creamy sauce.
  2. Sift flour, baking power, cocoa powder and caster sugar into a bowl. In a separate bowl/jug whisk together the milk, egg, butter and finally the red food colouring.
  3. Pour the milk mixture into the flour mixture and beat with a fork until you have a smooth batter. It may need a little rapid fork action, to remove all the lumps and don't worry if the mixture looks a little thick.
  4. Heat a non-stick pan over a medium heat, with a little oil or better still fry light. Add a ladle of batter, a second pancake if you think your pan can handle it!
  5. Wait until the top of the pancake begins to bubble slightly and the edges look like they're firming up and then flip over - I use a spatula because I'm a tad too cautious! When both sides are golden and the pancakes looking nice and fluffy, get it out and onto your plate.
  6. Serve immediately; pile the pancake stack high, smother with the chocolate ganache and scatter on any additional toppings you choose. I served mine with milk chocolate ganache, crushed malteasers and homemade smashed up honeycomb. Why not add some whipped double cream for extra luxury?
Keep calm and get your whisk on.

Love Jess xo


Eat: Fluffy American Pancakes

Hey foodies,


So with Valentine's Day out of the way, our new February focus is Pancake Day! Or should we say Shrove Tuesday. With scotch pancakes, crepes and fluffy American pancakes, the question is no longer just what topping, but what type! 

Over the last few weeks I've been whisking up some pancake magic and testing out my favourites, in anticipation of February 17th. 

As I spent all 2014's summer months in the US, a firm favourite has to be the fluffy American pancake. Serve them with crispy streaky bacon and generous drizzle of maple syrup or with lashings of greek yogurt, fresh raspberries and honey. The perfect lazy Sunday breakfast or delicious pancake day pud! 


Why not give these a try this pancake day?

Recipe adapted from BBC Good Food.

Ingredients

135g Self raising flour
2tbsp Golden caster sugar
1tsp Baking powder
2tbsp Melted salted butter
1 Egg, beaten
130ml Milk

Method

  1. Sift flour, baking power and caster sugar into a bowl. In a separate bowl/jug whisk together the milk, egg and finally the butter.
  2. Pour the milk mixture into the flour mixture and beat with a fork until you have a smooth batter. It may need a little rapid fork action, to remove all the lumps.
  3. Heat a non-stick pan over a medium heat, with a little oil or better still fry light. Add a ladle of batter, a second pancake if you think your pan can handle it!
  4. Wait until the top of the pancake begins to bubble slightly and the edges look like they're firming up and then flip over - I use a spatula because I'm a tad too cautious! When both sides are golden and the pancakes looking nice and fluffy, get it out and onto your plate.
  5. Serve immediately with your chosen topping, pile high in stacks or keep warm in a low oven.

How will you top yours?

  • Classic maple syrup and crispy bacon
  • Greek yogurt, raspberries and a little honey
  • Add some blueberries or chocolate chips when you flip the pancake and serve with whipped double cream
  • Chopped banana and Nutella
Let me know your favourite combinations!

Keep calm and flip them pancakes!

Love Jess xo


Tuesday, 10 February 2015

Celebrate: Singles' Guide to Valentine's Day

Hey foodies,  

With Valentine's Day looming and International Marriage Week in full swing, it's hard to not to indulge in a few heart shaped chocolates, but many people are mistaken in thinking that February 14th is exclusively for couples. Aside from it being my Dad's birthday, and this year it's a big one(!), this much derided holiday is actually about love, which as we know can be shared with anyone (or anything) in your life that you care deeply about.


So why not spend this weekend celebrating love, rather than cheapening romance?

This guide is more about single's success, rather than single's survival. Why shouldn't everyone celebrate, spread the love and take advantage of some fabulous deals on tasty, sweet treats! 
A little self gifting


Valentine’s Day is great for taking advantage of the many special offers or events. Why not plan a catch up with your friends - a girly night with fizz sounds great to me! Each year, restaurants, bars, and cinemas try to capitalize on the holiday by offering couples special discounts, but you can cheat the system by grouping up with some mates and getting yourselves a tasty dinner deal or even 2 for 1 cinema tickets. There are so many delicious Valentines gift ideas you can enjoy with your friends; a bottle of the finest fizz or maybe some heart shaped chocolates.  I can never say no to chocolate truffles!

Fancy something a little more extravagant?  Treat yourself to a spa treatment! There's always a fantastic array of spa deals for Valentine’s Day. All offers for couples? Pair up with a buddy and enjoy some well deserved pampering together.

Watch a ‘romantic’ film

This year for Valentine’s Day, Netflix is specially curating a selection of romantic films for couples to enjoy, but as we all know most romantic comedies are a little cliche. For the best selection, go off course from the typical recommendations, although Disney's Up and About Time are firm favourites of mine!

Even in adventure, action and horror films you'll find love. Alien is a great story about love and honour, but in the context and setting of a barren mining planet completely swarmed with bloodthirsty and terrifying predatory creatures. Or think about Fight Club, a charming story of a blossoming bromance between the protagonist and a figment of his imagination. Both these alternative films have great romantic storylines, if a little unusual!

Share the love


Take a little time on Valentine’s Day to share the love with the people that are important to you. Get together with close friends and family, share a cuppa over a box of tasty biscuits, get messy in the kitchen with some tasty Valentine's themed baking or hit the town with your besties.


Don't forget your grandparents! Cake always goes down a treat, if they haven't beat you too it! Whatever the activity, share it with those important, can't do without people in your life.

Escape


This picture is taken from gentle stroll through Sheffield earlier this year, with my boyfriend's giant schnauzer, Titch.

And no, I don't mean escape from Valentine's Day. Why not take a trip, just because you can! There’s nothing holding you back, so spend some time getting away from your familiar settings and delve deep into your adventurous spirit. Get on the train and explore the nearby towns. Take a train out into countryside and fill up on fresh air. Aside from being a great adventure, this can be very therapeutic and help develop your well-being and mindfulness. Being a Yorkshire girl, I'm surrounded by beautiful, idyllic country villages and nothing quite beats a Bakewell tart in Bakewell!

It's all about embracing love this Valentine's Day and making the most of another fabulous February weekend. What have you foodies got planned?


Lots of Valentine's love, 

Jess <3

Saturday, 7 February 2015

Eat: Maple Biscuits with The Biscuiteers DIY Valentine's Royal Icing

Hello foodies :)


It's been an incredibly busy week, baking up all kinds of sweet treats. With Valentine's Day fast approaching, like many foodies, you're probably looking at all the sea of delicious chocolate hearts, cookies, flower piped cupcakes etc., but what about doing something a little special and making it yourselves.


With a bit of encouragement from the fantastic team at Biscuiteers, I spent last weekend piping little love inspired biscuits. What screams love more than homemade!

I took the biscuits into work and the feedback was heart-warming!

"Confession – I scoffed the last 3 of these this afternoon! Can you share the recipe please? Absolutely delicious, and for some reason they brought back a flood of really early memories, of home and infant school and Christmas and all sorts of nice things. Quite unexpected!"

This makes baking all the more worthwhile.

I adapted this biscuit recipe from the Biscuiteers Pistachio biscuit recipe, which is equally tasty!

Maple Biscuits

These biscuits are soft and sweet, with a lovely golden crispness round the edges. As I used a smaller cutter, this recipe made absolutely loads of little biscuits, so you may want to buy a BIG box to fill with your lovely homemade treats.

Ingredients

167g Salted butter
167g Caster sugar
167g Maple syrup
2 Large eggs
470g Plain flour
127g Self raising flour

Method

  • Preheat the oven to 130°C
  • In a large bowl combine the butter, sugar, maple syrup, eggs and using a hand held mixer or stand mixer, mix at a slow speed until all the ingredients are combined. When the ingredients are mixed together, increase the speed so that all the lumps disappear.
  • Sift in both the flours and mix together until the mixture forms a smooth dough. Wrap the dough in cling film and place in the fridge for 30 minutes.
  • Place the dough on a sheet of parchment and begin by gently squashing the dough down with a rolling pin or your hands. Cover with a second sheet of parchment and then use the rolling pin to roll out properly. The top sheet of paper may crinkle from time to time, just peel it off and smooth it down gently before starting to roll again.
  • You can use any shaped  cutter, but as it's the month of love I used a small heart shaped cutter and a round cutter, to cut the dough. If you can't find a cutter, you can always try free hand by using a sharp knife. This technique looks a little more rustic and homemade. Place on a parchment paper lined baking tray, ready for the oven.
  • Bake in the middle of the oven for 26 minutes or until the biscuits are slightly golden in colour. my biscuits took less time, due to being slightly smaller, so bare that in mind when you're walking out of the kitchen!
  • When the biscuits are evenly cooked remove the trays from the oven and transfer the whole sheet of parchment to a cooling rack. Do this carefully as the biscuits will be quite fragile and hot!
  • Make sure the biscuits are completely cool before starting to ice.

Royal Icing


The Biscuiteers suggest one of three royal icing recipes, which can be found on their blog. I chose to use their egg white recipe, but be wary because it makes a lot! In fact, I refrigerated mine to use on other baking projects the following day.

Ingredients

4 Egg whites
900g Icing sugar

Method

Royal icing is incredibly simple to make and so satisfying to watch the bright white ribbons as it whisks.

  •  Place the egg whites into a large mixing bowl. If using a stand mixer, make sure the bowl is compatible.  
  • Add the icing sugar and whisk or for about 5 minutes using an electric whisk or stand mixer. If you want to do this by hand, use a wooden spoon and you may need to beat it for longer. Make sure you start whisking quite slowly, to avoid clouds of icing sugar coating you and your kitchen! 
  • Continue whisking until the ingredients form a thick, smooth paste that is bright white in colour and has the consistency of toothpaste.
Note: At this stage you can whisk in your favourite colours! I recommend gel colours, which interfere less with the consistency. Also, it you're not using the icing straight away, make sure you cover the bowl and refrigerate, to avoid the icing drying out.


Let the Piping Begin...

  • Fill your reusable piping bag with a few spoonfuls of your chosen colour and cut the tip of the piping bag to create a small opening for the icing to flow through. Alternatively, you can place a small writing tip in the piping bag. I would recommend Wilton nozzles 1 or 2.
  • You need to pipe an outline on each of the biscuits, so that the smooth flood icing remains contained. Make sure there are no gaps in the outline!


  • Leave the biscuits for around 5 minutes to dry, before using the flood icing.
  • Flood icing is a little looser than the royal icing used to create the outline. You can loosen the icing by gradually whisking in water. I was extremely cautious here and ended up not loosening my icing enough, which made the flooding more difficult. It is good to be cautious, but you want it to be runny enough to move fluidly when poured.
  • Once the flood icing is sufficiently loose, place it in a squeeze bottle or reusable piping bag and flood each biscuit, following the outline of the shape inwards. Make sure to use a cocktail stick to carefully remove any air bubbles or gaps and give the biscuit a tap against a hard surface, to even out the coating.
  • Once evenly coated, place the biscuits back onto the baking tray and into the oven at 50C or the lowest setting your oven will go. Leave them to set in the oven for around 30 minutes and serve them once cooled.


Check out the Biscuiteers online tutorial.


LOVEly Designs

If you're up for a bit more of a challenge, why not try the Biscuiteers polka dot biscuit, with white spots of royal icing piped onto the base, whilst wet. You can also pipe over the dry designs with writing, like seen in my pictures. SweetAmbs has some other Valentine's inspired designs too!


Feeling Lazy?

If you're not up for handmade treats this year or you haven't got the time, why not check out the Biscuiteers online shop for a quick valentines biscuit delivery!


Keep calm and spread the love <3

Jess xo


Monday, 2 February 2015

Eat: Double Cream Fudge

Hey foodies,


So like I mentioned on my previous post, I'm testing fudge recipes for a new business venture. I've been running little focus groups with each type, just to get the gist of what all you fudge eaters are looking for in your favourite fudge. It has been a battle between, texture and flavour, with a few tests still to go.

As you may know, fudge is made by bringing milk, sugar and butter up to about 114c. The question is, which milk product or sugar type makes the best, tooth achingly sweet fudge.


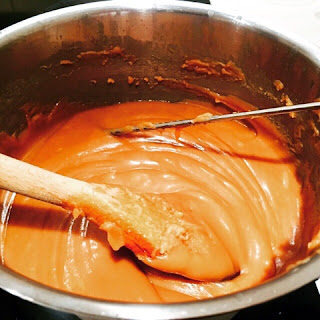
The first in my trials was a double cream recipe. A particularly simple recipe, if a tad indulgent, this fudge was soft and creamy. You couldn't eat a lot though, it was rather rich. Nonetheless, it was gone rather quickly! 


Check out the recipe below and give it a go yourself!


Keep calm and get your wooden spoons ready!

Love,

Jess

Creamy Fudge 

Adapted from All Recipes UK

Ingredients:

  • 400ml double cream
  • 450g golden caster sugar
  • 50g butter
  • 1tbsp liquid glucose
  • 1tsp vanilla extract (optional)

Method:

Prep: 15 min | Cook: 15-20 min | Cooling: 3 hour (min)


  1. Grease and line the base of a square 20 cm cake tin
  2. Combine all ingredients in a heavy, deep saucepan, over a medium heat and stir until the sugar has dissolved.
  3. Put your thermometer into the mixture and increase the heat to medium-high, bringing the mixture to a rolling boil. Keep the mixture at a rolling boil, stirring occasionally to stop the mixture catching the bottom of the pan, until the temperature reaches 114 degrees C - 116 degrees C. This is known as soft ball stage, if you don't have a thermometer, you can test by dropping a little of the mixture into cold water, if it's ready, it will form a soft ball. At this stage, remove the pan from the heat.
  4. Once the temperature has dropped to 110 degrees C, about 5 minutes cooling time, beat the mixture with a wooden spoon. Keep the thermometer in, to watch the temperature drop to 60 degree C. This should take about 10 minutes and there is a noticeable difference in the fudge, going from a glossy texture, to more granular. The fudge should also feel a lot thicker and start to move away from the sides of the pan.
Note: This is the most important stage, as during cooling, small crystals form, which when beaten, create a smooth texture. Without this, your fudge may be granular.

      5. Once thicker and loosing shine, you have a small window at which to get the fudge into your prepared tin and leave to cool until set. Once set cut and package or serve.

Note: Do not be tempted to rush this stage, as putting fudge in the fridge actually prevents the fudge from setting properly and can cause it to loose its firmness, becoming sticky and difficult to cut.


Enjoy!