I had quite a busy, but productive, week last week. Feeling rather refreshed this January and ready to step everything up a notch. After deciding on selling my baking, I decided that last week I would do a little cupcake mixology and refine my favourite flavours. SO MUCH FUN! Can you wait for my valentine edition? Well I might just make you ;)...
As for recipes...heres another little alcoholic number for you to try. This little request was for a vodka kicking cupcake...keep calm it's only a tipple kiddies ;)
Citrus Kick
Ingredients
Sponge
80g softened unsalted butter
280g golden caster sugar
240g plain flour
1 heaped tbsp baking powder
pinch of salt
240ml semi skimmed milk
2 medium eggs
juice of half a lemon
rind of half a lime
Frosting
100g unsalted butter
40ml semi skimmed milk
2 tbsp of vodka
400g icing sugar
sugar flowers/lime rind etc. to decorate
Magic Method
1. Preheat your own to 190c and line a muffin tray with cases.
2. Using an electric whisk (or spending a lot of time by hand) slowly beat butter, sugar, flour and baking powder, until the ingredients resemble a fine breadcrumb consistency.
3. In a separate bowl, whisk the milk and eggs, until light a frothy and slowly mix into the dry mixture.
4. Once everything is mixed in, blitz with an electric mix until a super smooth batter is formed. Add in the extra rind and lemon juice and combine.
5. Divide between the muffin cases until three quarters full and then bake in the oven for 20 minutes, until golden and springy to touch.
6. Remove from the oven and place on a wire rack until cool.
7. Whilst the buns are cooling, make the icing. In a large mixing bowl beat the butter, milk, vodka and half the icing sugar. This make take a while by hand, and even a few minutes with an electric whisk.
8. Add the remaining icing sugar and beat until smooth and creamy.
9. Once the cupcakes are cool, decorate the cupcakes, with the buttercream, using a palette knife to create a neat swirl.
10. Decorate with lime rind or sugar flours.
Sorry for the delay guys, look out for the next few posts on store cupboard essentials and Valentines treats...
Keep calm and don't get too tipsy...
Best wishes,
Red Velvet xo
Tuesday, 31 January 2012

Thursday, 19 January 2012
Valentines Preparation...
So in a couple of weeks it will be the celebrated day of love. Do you agree we should only celebrate it one day of the year? Maybe not, but why not take the chance to spend a little loooove time, with your loved ones. On the 14th it is also my Dads birthday, bless him, so I shall be showering lots of presents, and of course baking treats, for the whole week...so keep your peepers at the ready.
In addition, I am planning to join an online blog linking day, on the days prior to Valentines, in order to give you the opportunity to shop for delicious baking treats and ideas, through a variety of beautiful blogs. Now you wouldn't want to miss that now, would you?
As for my own personal preparation, I have started buying some pretty sprinkles and lovely little cupcake cases. I am also planning on making some beaut red velvet whoopie pies for a friend of mines Valentines ball. So keep checking for recipe updates :).
Furthermore, I'd like to direct your attention to another site that I am getting quite familiar with :) ToSouk. This website holds lots of little treats and vintage items, for you to purchase and browse. I have started putting some of my most favoured baked items on there and over the Valentines period will be taking themed orders, if any one is interested :).
Keep in touch, requests are always welcome.
Love, as always.
Red Velvet<3
Sunday, 15 January 2012
Rough Rocky Road...
A few years ago, I was asked to help the younger members of my school choir, organising a break bake sale to raise money for a departmental music trip. A lot of people brought in buns and biscuits, but I wanted to bring in something a little different. I took this opportunity to make Rocky Road bars. They sold out fast!!
In addition, this recipe was a request from a good friend of mine, raising money for a life changing trip to Fiji. I wish her the best of luck and I'm sure this recipe will do you proud Amy <3
TOP TIP: I have made these a few times now and to get them to set like a proper refrigerator cake, it's more beneficial to use the exact amount, if not less, of biscuit and additional chocolate.
Ingredients
125g soft unsalted butter
350g quality dark chocolate, broken into pieces
3 tbsp golden syrup
200g rich tea biscuits
100g mini marshmallows (larger marshmallows chopped up can be substituted)
icing sugar to dust
Magical Method
1. Melt the butter, chocolate and golden syrup in a large sauce pan. Once melted and combined, place around 150ml of mixture to one side.
2. Place the rich tea biscuits into a freezer bag and seal, before bashing the biscuits into shards, with a rolling pin. Good for stress relief, just don't go too crazy!
3. Fold the biscuit pieces, crumbs and marshmallows into the saucepan full of chocolate and combine.
4. Transfer the mixture into a tray (24cm square/rectangle), lined with foil (parchment will do), and flatten with a spatula.
5. Pour the remaining chocolate over the top and smooth to finish.
6. Refrigerate for four hours, preferably overnight.
7. Before serving, cut into fingers or squares and dust with sieved icing sugar.
Easy peasy, lemon squeasy! Get the kids involved for a treat.
Variations
In some cases you may want to add nuts and/or glacier cherries to the mixture, for a fruity twist!!
Keep calm and polish 'em off, kiddies!
Have fun,
Red Velvet xo
Sunday Supper Slimline Souffles...
Well, as always in January, we set ourselves up for changes and challenges in the New Year. A regular favourite amongst my family and friends, is losing weight. But we really do love food!
Last year I spent a lot of time reviewing recipes and suggestions for low calorie, but satisfying, puddings. I think this really is a winner :). Add it to your diet plan and see the results of weight loss and foodie heaven, combined.
Chocolate Orange Souffles
Ingredients
sunflower oil for greasing
50g golden caster sugar
2 tbsp cocoa powder
juice of half a lemon
3 medium egg whites
rind of 1 orange, grated
Decorate
dark chocolate shavings
creme freche
cream/ice cream (if you're feeling naughty)
Magical Method
1. Set the oven to 190C (170C for fan assisted ovens) and grease 4 100ml ramekin dishes.
2. Gently combine the caster sugar, cocoa, lemon juice and orange rind, and set aside.
3. In a grease free bowl, whisk the egg whites, using an electric whisk, until forming soft peaks.
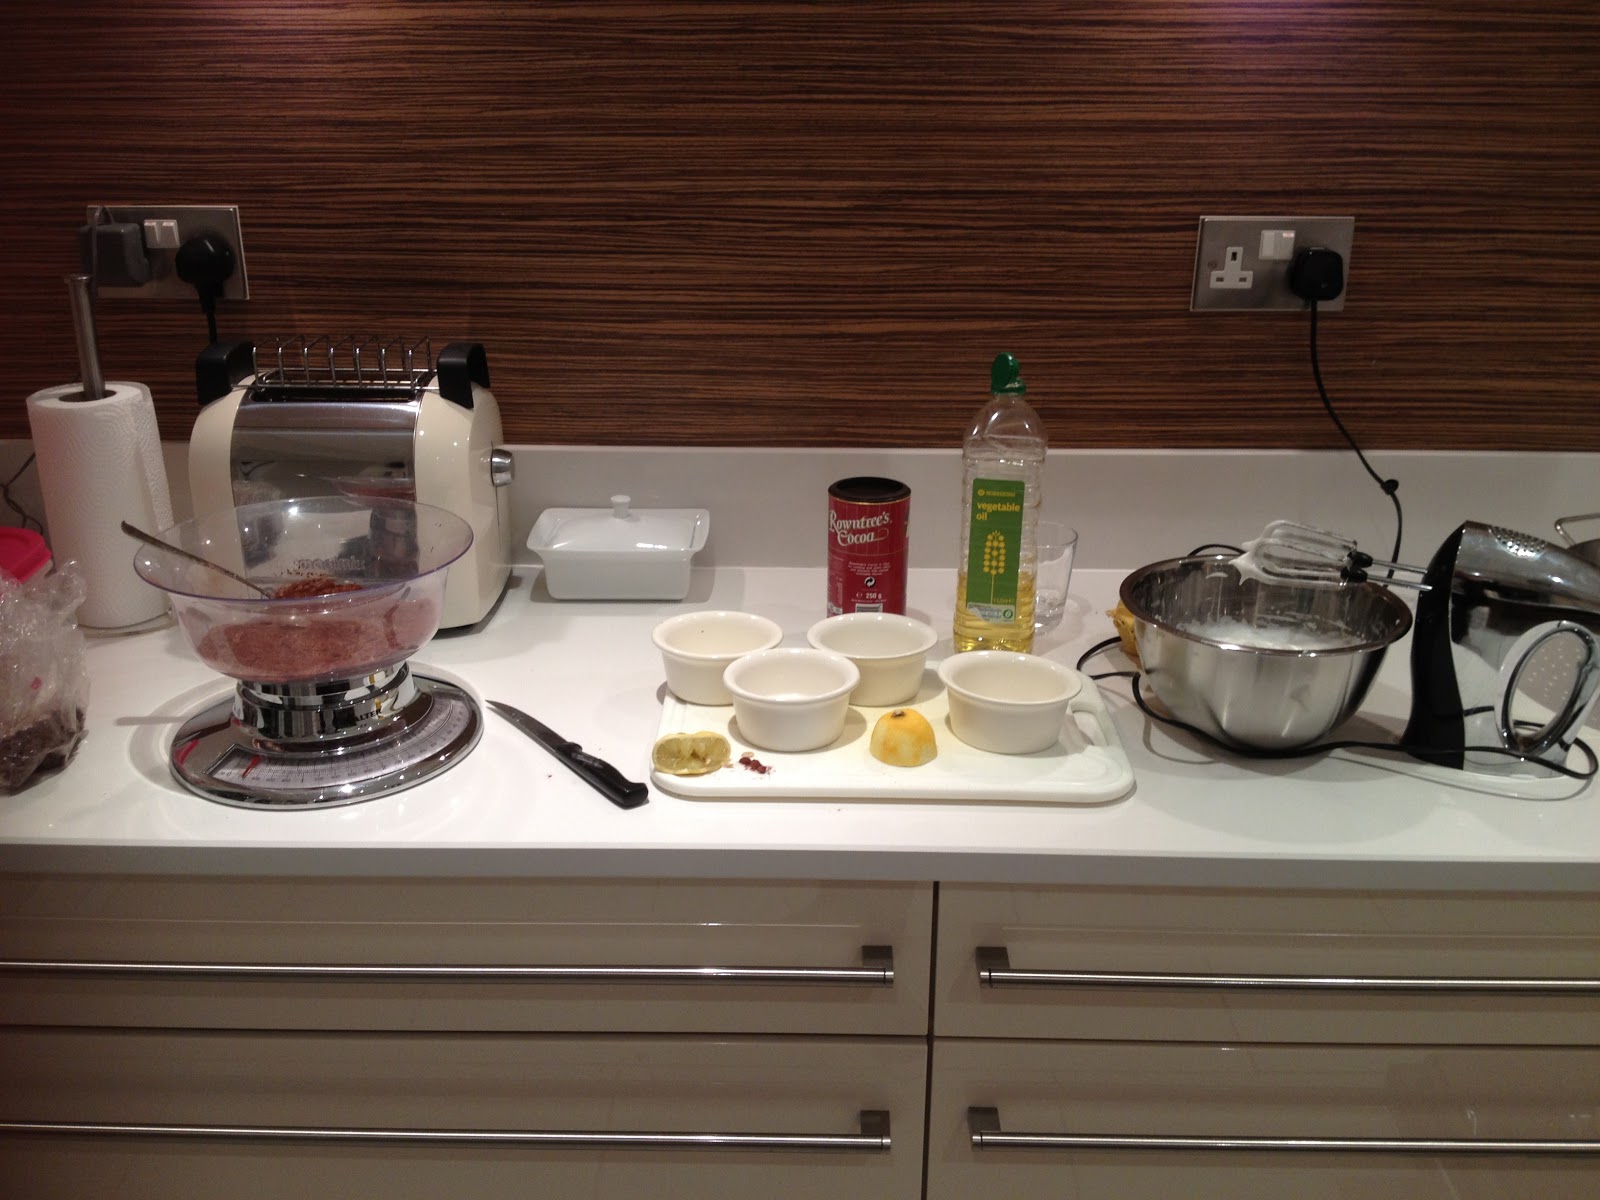
4. Carefully whisk in the cocoa mixture, until thoroughly combined. Divide between the four ramekins.
5. Place the ramekins on a baking tray in the centre of the oven, for 12 minutes, until risen.

6. Once baked, remove and serve immediately with your choice of creme freche, cream or ice cream and decorate with chocolate shavings.

Variations
Why not try using mint, instead of orange rind. Or possibly serving the souffles with a white chocolate infused cream for a more decadent dish.

At only around 80 calories a pop, why not treat yourself this evening. Simple, easy but ridiculously delicious.
Keep calm and dig in, kiddies.
Love,
Red Velvet xo
Saturday, 14 January 2012
Food for Thought...
Hey foodies!!
Just a quick blog to highlight the ever expanding list to the right of my blog posts. I have been researching the internet and in magazines for fresh and unique blogs, looking at fantastic baking schools and websites, full of inspiration. I decided to share my favourite findings with you guys, of corse, and over the next few months can't wait to see the list grow!
If you know of any fantastic websites, magazines or anything you find inspiring, let me know! I'm happy to feature your own work also...
Get in touch kiddies.

Keep calm and always keep in the kitchen <3
Love,
Red Velvet xo
Friday, 13 January 2012
Zesty Carbonara...
This evening I thought I'd cook up a little pasta carbonara, however we had way too many sausages that needed eating. I decided on making my carbonara with a little saussy twist...give it a go! It's truly delicious.
Ingredients
6 good quality pork sausages
3 rashers of quality smoked bacon, diced (pancetta can be substituted)
1 or 2 punnets of button mushrooms
tbsp of salted butter
4 large egg yolks
125ml double cream
4 cloves of garlic, crushed and minced
125g parmesan (cheddar can be substituted)
handful of freshly chopped parsley

good squeeze and rind from half a lemon
500g tagliatelle (penne can be substituted)
drizzle of olive oil
pinch of rock salt
good grind of coarse black pepper
1. Remove the skins from the sausages, and roll the pork meat in to rough balls. Place the garlic, sausage meat and bacon into a large frying pan and fry at a moderate heat. Stir occasionally.
2. Put the pasta over a moderate heat, in salted water, and drizzle a little olive oil in the pan to aid the softening of the pasta
3. In a separate bowl whisk the egg yolks, double cream, lemon, salt and pepper until thick and creamy. Add a handful of the cheese and the parsley.
4. Add the mushrooms and butter to the meat and lower the heat. Stir occasionally.
4. Once the pasta is cooked, drain 3/4 of the water and mix the pasta, egg mixture and remaining water. The heat from the pasta should gently cook the egg. Add in the meat mixture and toss lightly.
5. Serve immediately, sprinkling the remaining cheese and a grind of black pepper on the top.
 Serves 4.
Bon Appetite :)
Keep calm and scoff a load, kiddies!
 Love&funeating
Red velvet <3
Ingredients
6 good quality pork sausages
3 rashers of quality smoked bacon, diced (pancetta can be substituted)
1 or 2 punnets of button mushrooms
tbsp of salted butter
4 large egg yolks
125ml double cream
4 cloves of garlic, crushed and minced
125g parmesan (cheddar can be substituted)
handful of freshly chopped parsley

good squeeze and rind from half a lemon
500g tagliatelle (penne can be substituted)
drizzle of olive oil
pinch of rock salt
good grind of coarse black pepper
1. Remove the skins from the sausages, and roll the pork meat in to rough balls. Place the garlic, sausage meat and bacon into a large frying pan and fry at a moderate heat. Stir occasionally.
2. Put the pasta over a moderate heat, in salted water, and drizzle a little olive oil in the pan to aid the softening of the pasta
3. In a separate bowl whisk the egg yolks, double cream, lemon, salt and pepper until thick and creamy. Add a handful of the cheese and the parsley.
4. Add the mushrooms and butter to the meat and lower the heat. Stir occasionally.
4. Once the pasta is cooked, drain 3/4 of the water and mix the pasta, egg mixture and remaining water. The heat from the pasta should gently cook the egg. Add in the meat mixture and toss lightly.
5. Serve immediately, sprinkling the remaining cheese and a grind of black pepper on the top.

Bon Appetite :)
Keep calm and scoff a load, kiddies!

Red velvet <3
A Little Cupcake History...
I found this rather interesting, thought you might too! :)

Red Velvet xo
Subscribe to:
Posts (Atom)